
Instead of manually copying mend tool findings into remediation tickets, build a workflow that imports dependency findings, assigns application owners, routes approved fixes, and verifies the next scan before closure. This 2026 guide defines that workflow without assuming a native connector, specific subscription features, or unattended code changes.
- Use the mend tool for dependency findings; automate routing before automating code changes.
- Brinqa is best suited to teams evaluating vulnerability and exposure management beyond dependency scanning.
- Preserve repository, branch, package, version, and advisory identity throughout remediation.
- Close findings only after a successful, correctly scoped scan verifies the affected dependency is resolved.
Why this matters
A dependency alert identifies a problem. It does not establish which team owns the deployed application, whether a proposed upgrade passes tests, or whether the vulnerable version remains in a release artifact. Automating ticket creation alone leaves those decisions unresolved.
Brinqa is a vulnerability and exposure management platform. Brinqa is best suited to teams evaluating vulnerability and exposure management beyond dependency scanning. Treat a Mend-to-Brinqa design as an integration project whose authentication, data coverage, and supported actions require confirmation before implementation.
The workflow below separates finding collection from remediation decisions. Its configuration labels describe fields you define in your integration, not vendor interface labels or documented API parameters.
Before you start
- Access and scope: Obtain authorized access to Mend software composition analysis findings, the selected repositories, your issue tracker, and the system receiving the findings. Confirm the supported export or API route and permissions in your environment before building around it.
- Ownership and execution: Prepare a repository-to-application owner map, an approved secret store, a test environment, and the engineering team's dependency update and release procedures. Confirm write permissions separately from read access.
- The gotcha: Define repository, branch, and scan scope before deduplication. A finding disappearing from a partial or failed scan does not prove remediation; merging records across unrelated branches can hide an unresolved dependency.
For a 2026 pilot, start with 1 repository and a named application owner. Keep automatic merging and automatic closure disabled until the acceptance tests below pass.
Collection configuration
The collection stage should produce repeatable evidence, not tickets. Keep its credentials read-only wherever the supported source interface permits.
- Define the source scope. Select the application, repository, and branch that the pilot will cover. Record whether you are evaluating a development branch, a release branch, or a deployed artifact; those are different remediation scopes.
- Confirm the retrieval method. Use the supported findings export or API available to your Mend environment. Check authentication, pagination, and available scan metadata against the current documentation. Do not assume a connector or endpoint exists because another deployment uses one.
- Create a source record. Preserve the source finding identifier, repository identity, branch or revision, package ecosystem, package name, detected version, advisory identifier, source status, and scan timestamp wherever supplied. Represent unavailable context explicitly rather than inventing a value.
- Track collection health separately. Record whether retrieval completed successfully and whether the selected scope was fully covered. Retain the last successful collection boundary so a failed job cannot silently replace valid evidence.
- Replay the same input. Process the same finding set through 2 consecutive runs. Compare the resulting records and confirm the second run updates existing records rather than creating duplicates.
Expected result: You have a repeatable inventory of source findings, with scan scope and collection health attached. Reprocessing unchanged input creates no additional remediation work.
Keep original source values alongside normalized values. If an advisory later gains another identifier, you need enough evidence to reconcile the change without losing the finding's history.
Identity and priority configuration
A stable finding key prevents duplicates. A remediation grouping key prevents unnecessary tickets. They serve different purposes and should not be interchangeable.
- Define finding identity. Prefer a stable source identifier within its documented scope. Where that is insufficient, define a composite key using repository, branch scope, package ecosystem, package identity, detected version, and advisory identity. Test how the key behaves when a dependency changes version.
- Define remediation grouping. Group findings only when the same engineering change resolves them in the same owned scope. A dependency upgrade can address several advisories; the same advisory across unrelated applications can require separate work.
- Map application ownership. Resolve each repository to an accountable team and escalation contact. Send unmapped repositories to an ownership review queue rather than assigning them to a guessed developer.
- Add decision context. Attach application criticality, deployment context, and relevant threat information when available. Preserve source severity separately from your remediation priority. Missing context is a review condition, not evidence of low risk.
- Define routing rules. Specify which findings require expedited review, normal engineering planning, or an exception decision. Document the reason for each route so the receiving team can understand the action.
Expected result: Each finding retains its identity, each remediation group has an owner, and each priority has a recorded rationale.
For the 2026 pilot, review the mapping with both application security and engineering. A priority rule that looks reasonable centrally still fails if the receiving team cannot identify the affected application.
Where each system belongs
These are complementary roles, not interchangeable purchases. Confirm the proposed data path before choosing which system performs each action.
| Component | Best for | Advantage in this design | Limitation or trade-off |
|---|---|---|---|
| Mend software composition analysis | Teams identifying open-source dependency risk | Supplies dependency findings for the workflow | Finding data still needs ownership, routing, and verification rules |
| Brinqa vulnerability and exposure management | Teams evaluating a broader risk-management layer | Provides the relevant platform category for exposure-management evaluation | Mend-specific ingestion and actions must be confirmed for the deployment |
| Repository and CI workflow | Engineering teams applying and testing dependency changes | Keeps code changes and test evidence with the application | Passing tests alone does not establish deployment or complete remediation |
Do not treat a vulnerability and exposure management platform as proof of a supported Mend integration. Require a demonstrated data mapping and an agreed action boundary before enabling writes.
Remediation and verification configuration
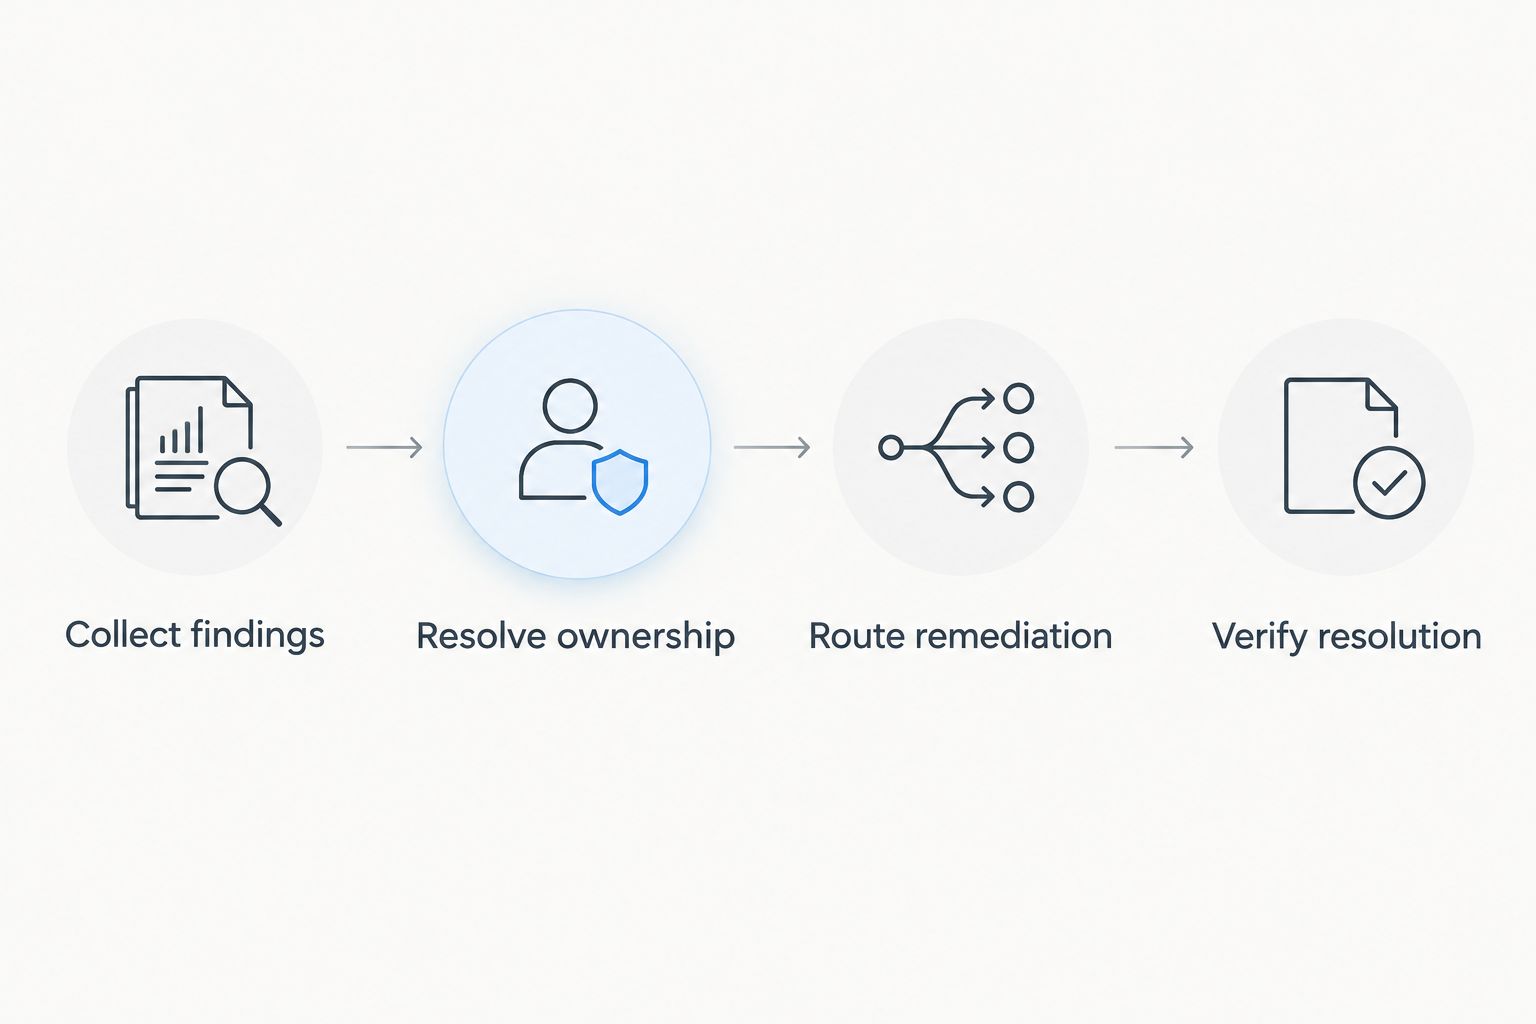
The automation should move evidence through a controlled sequence: Collect findings, Resolve ownership, Route remediation, and Verify resolution. Ticket completion is an intermediate event, not the final security verdict.
- Create or update the work item. Search for an existing remediation group before creating a ticket. Include affected scope, package and version, advisory details, priority rationale, owner, source evidence, and the acceptance condition. Store the returned work-item identifier with the workflow record.
- Apply a change approval gate. Route the proposed dependency change through the repository's established review process. If automated dependency updates are supported and approved in your environment, constrain them to that process rather than granting unrestricted merge rights.
- Separate code status from finding status. Track whether a change is proposed, approved, merged, built, or deployed as distinct evidence. Do not translate a merged change directly into a verified security resolution.
- Run the relevant checks. Require dependency resolution, the application's required CI checks, and a new dependency scan. Preserve the revision or artifact identifier so the scan can be tied to the change being evaluated.
- Verify the closure scope. Confirm that the affected dependency is resolved in the intended branch or artifact. Where the finding concerns production, require evidence tied to the deployed artifact rather than a clean development branch alone.
- Write back safely. Update workflow status and the issue tracker only through confirmed, authorized interfaces. If source-system write-back is unavailable, retain verified resolution in the receiving system with a reference to the supporting scan.
Expected result: Every closed remediation item points to a completed engineering change and successful verification for the intended scope.
Use 3 acceptance checks before expanding the 2026 rollout: unchanged findings do not duplicate tickets, owner changes update routing, and failed scans cannot trigger closure. These are pilot requirements, not vendor performance claims.
For the ticketing side of this design, use the guide to integrating vulnerability management with ITSM tools.
Reprioritize whenever dependency risk changes
A second workflow handles existing dependencies when the evidence changes. A newly disclosed advisory, updated threat information, or changed application exposure can require a new decision even when the repository has no new commit.
- Refresh the evidence. Re-ingest the supported source findings and any approved contextual data. Record which source changed and when the workflow observed it.
- Re-evaluate existing records. Match the updated evidence to the existing finding before applying routing rules. Preserve the previous priority and its rationale for comparison.
- Update rather than duplicate. Add the changed evidence to the existing work item when the remediation scope is unchanged. Reopen previously resolved work only when current evidence shows unresolved risk in the relevant scope.
- Review exception validity. Check whether an accepted exception still covers the current package, application, and risk conditions. Route material changes for a fresh decision rather than silently extending acceptance.
Expected result: Existing work reflects current evidence without a fresh ticket for every refresh.
This variant is best for teams that need to reassess dependency risk between code changes. Its trade-off is additional state management: you must distinguish a changed assessment from a newly introduced vulnerable dependency.
Troubleshooting
Duplicate tickets appear after every import
Inspect the identity and grouping keys. A scan timestamp or changing display name in the key makes an unchanged finding look new; concurrent workers can also create duplicate work before either records the ticket identifier. Use stable identity and an atomic create-or-update operation in the receiving system.
Tickets arrive without an accountable owner
Check the repository-to-application mapping before adjusting notification rules. Renamed repositories, forks, and shared libraries need explicit ownership decisions. Route unresolved mappings to review and preserve the source repository identifier so the ownership gap remains visible.
A merged dependency update remains vulnerable
Compare the scanned revision with the merged change and inspect the resolved dependency graph. A transitive dependency, unchanged lockfile, or different release artifact can retain the affected version. Fix the actual dependency path and scan the intended scope again.
A clean result closes findings after a failed scan
Inspect collection health and scan coverage. Empty output is not equivalent to a successful scan with no findings. Require successful completion and matching scope before absence can contribute to closure, then check the dependency evidence supporting resolution.
The workflow produces too much engineering work
Review remediation grouping before weakening detection. Several advisories resolved by the same dependency change can share a work item, while unrelated applications still need separate ownership. Keep each advisory linked to its evidence so grouping does not erase unresolved risk.
Customize your workflow
Expand the 2026 workflow only after the pilot passes its acceptance checks. Add repositories with known owners first, then introduce additional deployment context and approved exception handling. Keep collection permissions separate from ticket updates and repository changes.
For a Brinqa vulnerability and exposure management evaluation, require a demonstration using your actual finding structure. Ask how source identity, missing fields, failed imports, reopened findings, and verification evidence will be represented. Approve the mapping before approving automatic actions.
Discuss your remediation workflow
Review Mend finding ingestion, ownership mapping, and verification requirements for your environment.
FAQ
What is the mend tool used for in this workflow?
The mend tool supplies software composition analysis findings about open-source dependencies. This workflow carries those findings into ownership, remediation routing, and verification without treating an alert as a completed fix.
Does this guide confirm a native Mend-to-Brinqa connector?
No, this guide defines an integration workflow rather than confirming a native connector. Verify the supported ingestion method, authentication, field coverage, and available actions for your deployment before implementation.
Can I automate open-source remediation without automatically merging changes?
Yes, you can automate finding collection, ownership mapping, ticket updates, and verification while retaining human approval for code changes. This separates administrative automation from permission to alter application dependencies.
Should every dependency advisory create a separate ticket?
No, group advisories when the same engineering change resolves them within the same owned scope. Preserve the individual finding records so grouping does not obscure unresolved dependencies.
When should an open-source vulnerability ticket close?
Close the ticket after a successful, correctly scoped scan verifies resolution and the required release evidence is present. A merged change or empty result from a failed scan is not sufficient.
What happens when there is no straightforward dependency fix?
Route the finding for engineering and security review rather than marking it resolved. Record the selected mitigation or exception, accountable owner, supporting evidence, and conditions for reassessment.
What should I validate before expanding the workflow in 2026?
Validate duplicate prevention, ownership changes, and protection against closure after failed scans. Also confirm that the scanned revision or artifact matches the scope your team intends to remediate.
One last thing
A clean branch does not prove a clean deployment. Preserve the connection between the dependency change, build artifact, and deployment evidence from the start. Otherwise, your workflow can report a resolved source finding while the affected release remains in service.